Posted 18 November 2020 by
Keith OsborneWhen moving to a new home, most of us take existing furniture with us and if we’re honest, some of it can do with being spruced up – especially if it’s rather old but much-loved.
For a lot of people, the thought of reupholstering their furniture is daunting. You love the idea of upcycling your existing furniture, breathing fresh life into something you love and avoiding waste, but the actual process is complicated.
Here’s a beginner’s guide to reupholstery with Ryan Ball from South West Upholstery:
You will need:
Fabric – Take the time to consider it carefully. Fabric with a bit of heft, that’s heavier, will prove to be more durable. If you’re choosing a pattern, remember to consider the size of the area that will be visible – large patterns don’t work on small areas and vice versa. Try to find something that’s non-stretchy, as this will ensure you can create a smooth, taut finish.
Staple gun – Get a good, strong gun capable of easily affixing fabric (even thick fabric) to your frame
Upholstery studs (optional) – these aren’t essential but can create a wonderfully decorative finish that is relatively inexpensive. You will need a small hammer too.
Fabric scissors – You will need a pair of high-quality and sharp fabric scissors. Reserve them for fabric only – if you use them for anything else they will become blunt.
Pencil/chalk – Tailor’s chalk and/or water-soluble pencils are perfect for marking measurements on your fabric. It doesn’t stain, and as long as you mark the back, won’t be at all visible.
Webbing (optional) – If you’re reupholstering something like a dining chair you will need to replace the webbing, which frequently sags on old chairs that have been well used. Replacing the webbing is a cheap and easy way to ensure your freshly upholstered chair will be sturdy and stable. Webbing needs tacking in place, so you will need tacks and a hammer.
Seat pad/foam (optional) – Another thing to consider for chairs is whether or not the seat padding needs replacing. Like the webbing, cushions and padding can easily become flat and uncomfortable. Seat pads and foam are easy to use and cost-effective. They’re easily cut to whatever size you need. You’ll need some adhesive spray that is effective on foam, as well as wadding or batting to create a smooth finish.
Screwdriver – A large and small flat head screwdriver will be needed for removing screws and hinges.
Penknife/box cutter – A sharp knife for removing any leather and unpicking tricky fabric is essential.
Staple remover – The majority of furniture (especially modern furniture) has staples somewhere on the frame. They’re heavy-duty fabric staples placed using a staple gun and won’t come out easily without a staple remover. If you’re using a staple gun yourself, it’s useful to have one on hand in case you make a mistake – this is the fastest, easiest and safest way of removing staples, so it’s well worth the investment.
Once you have assembled everything you need, there are some simple steps to follow in order to effectively reupholster your furniture…
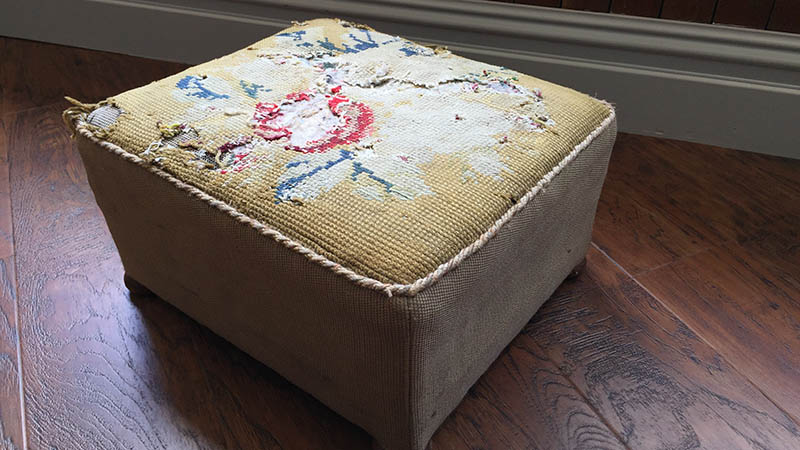 Before
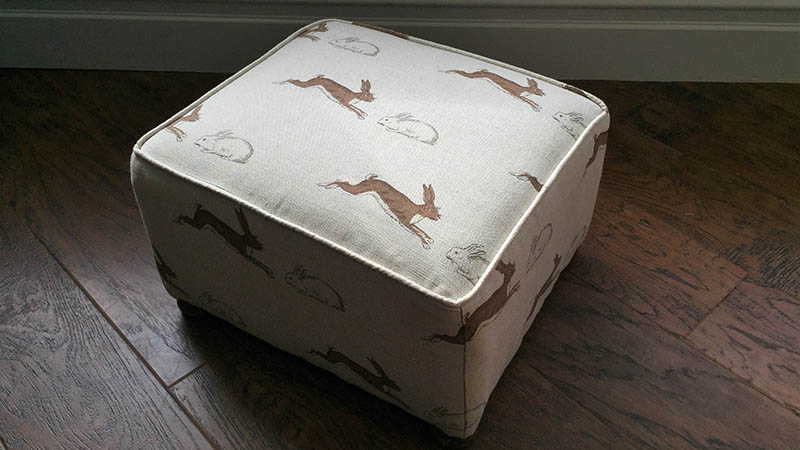 After
After
Step 1
Select a simple item of furniture to begin with, like a footstool, ottoman, or dining chair. Once you’ve mastered easy pieces you can work your way up to more complicated projects.
Step 2
Carefully remove all existing fabric. Try to keep it in one piece as you take it off, and don’t discard it – you can use it as a template for marking up and cutting your new fabric. Photograph everything as you remove the fabric and any other components you are replacing. This is a great trick that will ensure you remember exactly how everything was folded and attached.
Step 3
Consider if you need to give your project a new lick of paint or varnish. If you’re planning to do so, now is the time, after the old fabric and any other components you’re replacing have been removed.
Step 4
Take your time as you mark up, cut, and apply your new fabric and any other new components (such as webbing and foam pads). It’s tempting to try and get everything done in a single day, but if you rush, you’ll miss things, cut corners, and end up with a less-than-perfect result.
Step 5
Add some finishing touches. Upholstery nails, new handles, knobs or hinges can really make the difference. Don’t settle for just replacing the fabric elements, go the whole hog.
Find out more at www.swupholstery.co.uk